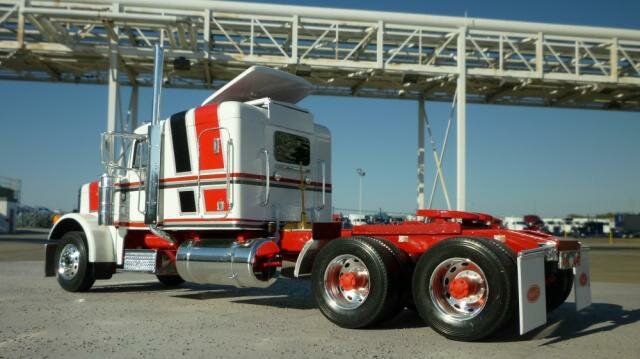
Reference pics for building the Italeri Peterbilt 378 kit - and converting a 378 into a 379-119 short hood.
The 379-119 was far more popular than the 378.
The 379-119 being an aluminum hood model was more of a premium offering and appealed to the traditional buyers.
The fiberglass hood 378 appealed more towards fleets than owner operators.
The 378 hood originated as the model 357 hood - the 357 was aimed at the vocational market for construction, concrete, dump etc.
With very little modification you can change the 378 kit into a 379 short hood.
Here's a line drawing comparison
378/357 on left 379-119 on right
379-119 on left 378/357 on right

Converting the 378 into a 379-119
You will need an Italeri Peterbilt 378 or the Peterbilt 378 "Long Hauler" kit along with a razor saw,
sand paper and flat scraps of plastic.
You will need to modify the forward cab mounts and the rear cab crossmember. You can either install the forward cab mounts and remove material from the bottom of mounts on the cab, or install the mounts on the frame lower on the side of the rails. I typically use the kit mounting location and remove material from the bottom of the cab. I like to install the hood temporarily to the chassis, then fit the cab to the hood THEN install the cab mounts to fit the hood. This way everything lines up later. I also like to install the exhaust "Y" pipe and the two chassis mounts after the cab is installed so that the exhaust piping will line up. Under the hood, you will need to adjust height of the "C" pipe from the turbo to the air cleaner piping as the slightly lower cab height will cause the pipes on the firewall not to line up properly. Since you are playing with the geometry of things - test fit multiple times to make sure everything lines up.
The Italeri 378 kit has the wrong battery box cover on the left. The kit has a RH tool box cover on the left. This box should be taller and have the raised step. The correct box is available from www.aitruckmodels.com.


The configurations are endless. Forward fuel tanks with battery boxes under the sleeper. Forward fuel RH only. Forward fuel with a COE battery box, or an over-the-rail battery box. Hydraulic fluid tanks. Single tank.
Extra tanks. 3 and 4 straps on each tank. Non-sleeper. 36" sleeper, 48 and 63 flat top sleepers. 48, 63 and 70" raised roof sleepers. Windows in the backs of the 36, 48 and 63" sleepers. Ultracab raised roof. Single exhaust. Dual exhaust, back of cab exhaust. Underframe exhaust. Back of sleeper exhaust. Paint air cleaners, single air cleaners, underhood air cleaner, visor, no visor, bullet roof lights, aero roof lights, round horns long, round horns short, square horns, 4 horns, 1 horn, no horn, horn on the side the roof for clearance, Single headlamps, dual headlamps, Texas style deep bumper, deep taper bumper, short taper bumper, straight bumper, bobbed bumped,
logger bumper, painted or polished bumper, driving lights, no driving lights, tow hook on bumper, single drive, tandem drive, tri-drive, lift axles, pusher axles, WB up to 365", multiple frame widths, tapered end of frame, straight end of frame, painted steel wheels, polished aluminum wheels, round hole, PB oval hole, off-set wide fronts and lifts, wide-base/supersingle rears, highway tires, off road tires.. the list goes on and on.
Most of the items I mentioned are easily done through kit bashing, resin or scratchbuilding. The ideas and possibilities are endless!


The 379-119 was in production from late 1986 as'87 models until 2007 Legacy Class models.
